How do I host a website on my NAS?
No matter if it is a personal blog, company website, or e-commerce website, ASUSTOR NAS's Web Server function lets you host your very own website right on the NAS. Furthermore, you can use App Central to download Apps for content management, database management, bulletin board systems and more, allowing you to easily set up all different types of websites in just minutes.
To host your website on your NAS, please follow the instructions below:
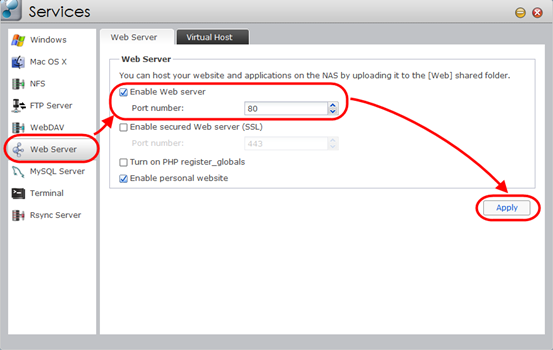
1. Select [Services] -> [Web Server]. Select the [Enable Web server] checkbox found under the Web Server heading and then click [Apply].
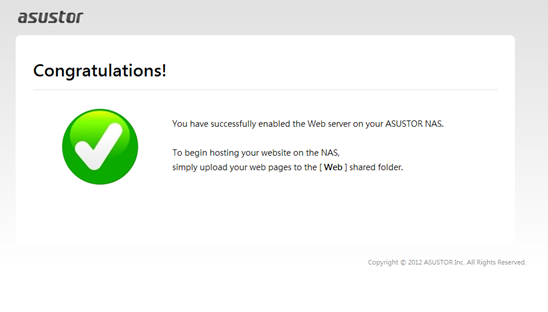
2. In order to check that the setting has been successfully applied, enter the ASUSTOR NAS’s IP address into a Web browser and connect to it. You should be able to see the “Congratulations!” page as shown in the graphic below. This page is located in the ASUSTOR NAS’s “Web” shared folder. In order to host a website on the ASUSTOR NAS, you must upload it to the “Web” shared folder of the NAS.
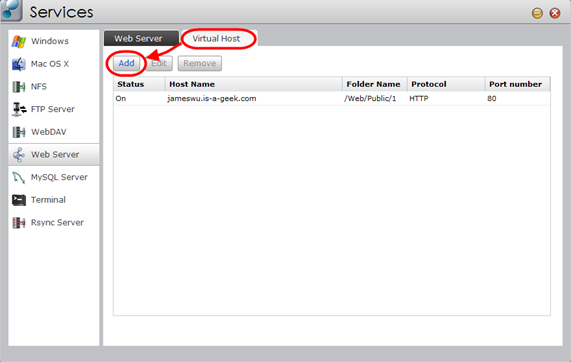
3. Now click on the Virtual Host tab and then click on the [Add] button.
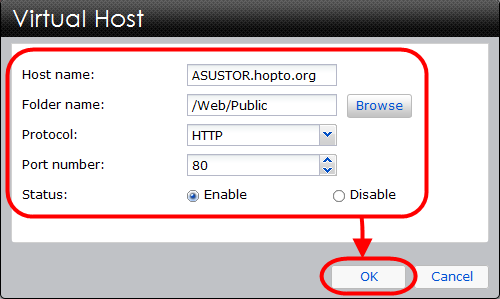
4. The Virtual Host window will now appear. Fill out the required fields and then click [OK] once you are done. Your website should now be successfully hosted on the NAS.
*Please note that if you need to fine tune the Web server on the NAS, you can use terminal service to connect to the NAS and configure .ini for apache server or php. Please refer to following link for instructions on connecting to the NAS’s terminal service:
If you encounter any problem when proceeding above configuration, please submit a support ticket in our support center to get further help: